Learning how to use task batching for DIY tasks becomes incredibly valuable when you are a maker juggling multiple similar responsibilities, switching constantly between tools, materials and mindsets, because these shifts not only drain your focus but also multiply your setup time, slowing your workflow and reducing the enjoyment you feel from completing meaningful hands-on projects.
Since crafting, home fixing, workshop routines and everyday DIY responsibilities each involve repeated steps, small preparations and ongoing adjustments, grouping similar actions into intentional batches creates smoother movement through your workspace and eliminates the friction caused by constant transitions, which frees mental energy, reduces wasted time and boosts overall workflow efficiency.
This extensive guide introduces a practical, example-heavy breakdown of how to use task batching for diy tasks in a realistic and sustainable way, offering a batching planner, checklists, timing suggestions, common pitfalls to avoid and even a printable-style planning sheet you can recreate in any notebook or digital tool, ensuring that you leave the guide with a full system ready to apply today.
Every section has been designed for busy makers who manage dozens of small tasks weekly, from preparing materials to finishing details, organizing tools, measuring components, applying coatings, sanding, cutting or sorting supplies, and the approach remains concise yet thorough so you gain clarity without any unnecessary complexity.
Why Task Batching for DIY Tasks Works So Well
DIY work consumes time not only because of the tasks themselves but because of the invisible overhead created by switching between tools, cleaning up, resetting your space, moving materials around and refocusing your attention, and batching eliminates this waste by consolidating similar actions into dedicated blocks of time.
Rather than performing one step of a project and then jumping immediately to something different, batching encourages you to group tasks by type, by tool, by workspace area or by energy requirement, which means you set up once, work smoothly through a batch and then transition only when the batch is finished, dramatically reducing switching time and cognitive load.
Makers benefit particularly strongly because hands-on tasks require physical setup, and every small reset adds friction, whereas batching transforms your workflow into a clear, efficient system where each stage flows into the next with purpose.
The Core Principles of Task Batching for DIY Tasks
Effective batching depends on a few fundamental ideas that help structure your process so it supports workflow efficiency without forcing you into rigid schedules or strict systems that remove the joy from creative work.
Key Principles
- Identify repeating tasks: find patterns in what you do often.
- Group by similarity: batch tasks that share tools, materials or workspace zones.
- Reduce switching: organize tasks so you move smoothly and avoid interruptions.
- Prepare once, execute many: set up tools a single time for multiple tasks.
- Finish batches completely: close a batch before starting another.
Applying these principles removes clutter from your workflow and builds momentum that carries through your entire DIY session.
Types of Batches You Can Use in DIY Projects
There are various ways to batch DIY tasks depending on your project style, materials, workspace conditions and personal preferences, and choosing the right category for batching ensures your workflow stays intuitive rather than forced.
1. Tool-Based Batching
- Cut all wood pieces during one saw session.
- Use the drill for every project step requiring holes before putting it away.
- Sew multiple seams across different fabric pieces without rearranging the machine.
2. Material-Based Batching
- Apply stain to all wooden pieces for the week in one batch.
- Prepare all yarn or thread before working on multiple crafts.
- Mix paint once and complete several coats on various items.
3. Location-Based Batching
- Group all garage-based tasks together.
- Complete all kitchen-area DIY fixes in one session.
- Handle attic or storage tasks in a single run to avoid repeated trips.
4. Energy-Level Batching
- Save detail-focused tasks for when you feel mentally sharp.
- Do repetitive tasks like sanding when your energy is lower.
- Handle heavy lifting in one batch during your strongest hours.
5. Project Stage Batching
- Prep all materials before starting assembly.
- Assemble everything before painting.
- Finish details on every project at the same time.
Using these batching categories helps you see your workflow more clearly and break it into smarter segments.
Building Your DIY Task Batch Planner
A batch planner translates your workflow into a predictable sequence, allowing you to visualize which actions belong together and how to reduce the number of times you set up, clean up or relocate tools.
Basic Planner Structure
- Batch Name: descriptive title identifying the set of tasks.
- Tools Required: list of everything needed for this batch.
- Materials Needed: items to gather before beginning.
- Tasks in Batch: detailed bullet list of mini-tasks.
- Estimated Time: realistic duration for the entire batch.
- Prep Steps: actions necessary before starting.
- Cleanup Steps: what must be done afterward.
This structure keeps your batching system practical and easy to reference anytime.
DIY Task Batching Checklist
A checklist ensures that you are not improvising every time you begin a new batch and that you use a repeatable process that reduces mistakes, forgotten materials and unnecessary resets.
Checklist
- Define the batch clearly.
- List all tasks that belong inside it.
- Gather every tool before beginning.
- Pre-stage materials for quick access.
- Prepare workspace for movement and safety.
- Set timing expectations to avoid underestimating.
- Eliminate distractions before starting.
- Complete the batch before switching tasks.
- Perform batch-specific cleanup.
- Update project notes with completed progress.
Using this checklist helps your batching feel structured and ensures nothing important slips through the cracks.
Timing Suggestions for Different Kinds of Batches
Timing matters because batching becomes most effective when the length of each batch matches your energy, your workspace conditions and the physical requirements of each task, so choosing smart time windows increases completion rates.
Short Batches (10–20 minutes)
- Sorting hardware like screws, nails or bolts.
- Labeling containers or bins.
- Cutting small pieces of fabric or paper templates.
- Selecting materials for upcoming projects.
Medium Batches (20–45 minutes)
- Sanding several pieces.
- Applying primer or base coats.
- Threading multiple bobbins for sewing.
- Cutting wood for multiple small builds.
Long Batches (45–90 minutes)
- Assembling multiple project components.
- Performing detailed painting or finishing.
- Completing repetitive craft production steps.
- Organizing workshop areas or storage zones.
Choosing a timing category that matches the physical intensity of your tasks helps maintain energy and consistency throughout your project day.
Common Pitfalls When Using Task Batching for DIY Tasks
While batching improves workflow efficiency significantly, makers sometimes encounter predictable pitfalls when first creating a batching system, and becoming aware of these issues ensures you avoid frustration early on.
Pitfall 1: Batching Too Many Tasks Together
- Large batches become exhausting and lose efficiency.
- Smaller, focused batches create better flow.
- Group only tasks that truly share tools or processes.
Pitfall 2: Forgetting to Gather Materials Before Starting
- Nothing kills batching effectiveness faster than missing tools.
- Use a pre-batch staging area to reduce interruptions.
- Check batteries, blades and supplies before starting.
Pitfall 3: Switching Tasks Mid-Batch
- Switching breaks your flow state.
- Commit to finishing the batch even if a new idea appears.
- Store spontaneous ideas in a quick note for later processing.
Pitfall 4: Underestimating Cleanup
- Cleanup is part of batching, not an optional add-on.
- Leaving tools out creates friction for the next batch.
- Integrated cleanup prevents workspace clutter from stacking up.
Pitfall 5: Batching Without Timing Boundaries
- A batch without timing can expand endlessly.
- Use timers to set soft boundaries.
- Track repeated batches to improve timing accuracy.
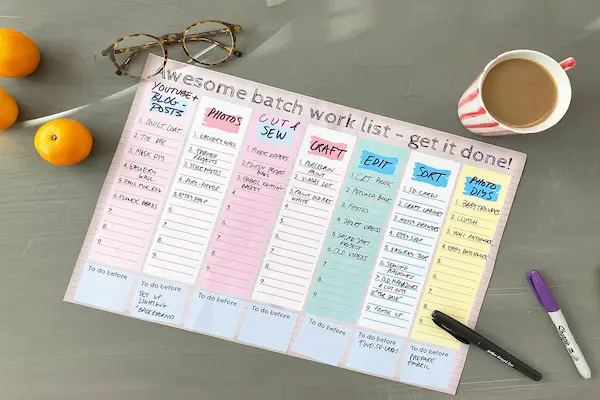
Printable-Style Batch Planner Sheet (Recreatable by Hand)
This simple sheet can be recreated easily in any notebook or digital tool, giving you a reusable batching format for all your DIY tasks.
Batch Planner Sheet
- Batch Name: ____________________________________________
- Tools Needed: ____________________________________________
- Materials Needed: ____________________________________________
- Prep Steps:
- 1. ____________________________________________
- 2. ____________________________________________
- 3. ____________________________________________
- Tasks in This Batch:
- • ____________________________________________
- • ____________________________________________
- • ____________________________________________
- Estimated Time: ____________________________________________
- Cleanup Steps:
- • ____________________________________________
- • ____________________________________________
- • ____________________________________________
- Notes: ____________________________________________
Real Examples of Task Batching for DIY Tasks
Seeing batching applied in realistic scenarios helps you visualize how dramatically the method improves your workflow, especially when juggling multiple small tasks across different projects.
Example 1: Woodworking Session
- Batch: Cutting
- Tasks: cut boards for shelf, cut small trim for frame, cut scrap pieces for jig.
- Tools: saw, clamps, measuring tape.
- Materials: boards, trim, scrap.
- Timing: 45 minutes.
Example 2: Sewing Session
- Batch: Preparation
- Tasks: cut fabric for three projects, thread machine, wind bobbins.
- Tools: rotary cutter, scissors, machine.
- Materials: fabric, thread.
- Timing: 30 minutes.
Example 3: Multi-Project Crafting Day
- Batch: Painting
- Tasks: paint wooden signs, paint frame edges, paint small figurines.
- Tools: brushes, palette, containers.
- Materials: paint, sealant.
- Timing: 60 minutes.
How to Evaluate Your Batching Efficiency
Assessment helps you refine your system so that each batch becomes smoother, faster and more natural, forming a self-improving workflow that adapts over time.
Evaluation Questions
- Did the batch reduce setup time?
- Were all materials ready before starting?
- Did I avoid switching mid-batch?
- Was cleanup simpler and faster afterward?
- Did the batch reduce mental fatigue?
- How can this batch be improved next time?
Final Checklist for Task Batching for DIY Tasks
- Select batch type (tool, material, location, energy or project stage).
- Define tasks inside the batch clearly.
- Gather tools and materials before starting.
- Prepare workspace for smooth action.
- Set realistic timing boundaries.
- Stay focused and avoid mid-batch switching.
- Perform cleanup intentionally.
- Evaluate batch effectiveness afterward.
- Record insights for future batching cycles.