Creating a simple project brief template that genuinely helps two people align their efforts, whether the collaboration involves building something hands-on, planning a creative piece, organizing a small service, or working on any personal DIY initiative, becomes far easier when the structure is clear, the language is practical, and the expectations are spelled out without unnecessary complexity, allowing both collaborators to stay on the same page from day one.
Because makers working with friends often start projects based on excitement, spontaneous ideas or verbal agreements, it becomes surprisingly easy for misunderstandings to appear later, especially when assumptions differ, when time constraints change or when the definition of “done” is interpreted differently by each person, making even a small project feel confusing if the goals are not written down somewhere accessible.
This long, methodical guide walks you through a crisp and casual approach to building a project brief that fits onto a single page yet carries enough clarity to prevent drift, scope creep, unfinished responsibilities or misaligned expectations, which is especially helpful for makers, hobbyists or creative partners who value collaboration but want to avoid awkward renegotiations halfway through a task.
Inside this extensive walkthrough, you will find a complete fill-in simple project brief template, examples of how to use each section, practical tips for defining scope, guidelines for selecting meaningful deliverables, advice for capturing constraints without sounding rigid, metrics for measuring success, and even a clear change log structure so any adjustments can be documented without confusion.
Why You Need a Simple Project Brief Template
Having a project brief saves you from losing direction, because even when both collaborators start with enthusiasm and shared vision, people interpret ideas differently once real work begins, and a brief acts as a stable reference that eliminates ambiguity by showing exactly what the project includes, what it does not include and how the final outcome should look.
Instead of relying on memory or informal conversations, a simple project brief template ensures that everything essential lives in one place — goals, tasks, deliverables, timeline, constraints, responsibilities and success measures — which drastically reduces friction later when decisions need to be made or when someone forgets an earlier agreement.
Creators working with friends benefit especially from using a brief because it keeps the work friendly, fair and balanced without requiring corporate jargon, and the document becomes not only a planning tool but also a subtle accountability anchor that helps everyone stay committed to what they agreed.
The Structure of a Strong One-Page Project Brief
A good project brief uses a minimal amount of text while carrying a maximum amount of clarity, which is why the structure below focuses on essentials rather than overwhelming details, helping both collaborators understand the plan in seconds instead of reading a multi-page document that feels unnecessarily formal for a friendly DIY initiative.
Core Sections of the Simple Project Brief Template
- Project Title: a clear and concise name that identifies the initiative.
- Objective: a single sentence describing the purpose of the project.
- Background: short context explaining why the project exists.
- Scope: what the project includes and excludes.
- Deliverables: specific outputs expected by the end.
- Constraints: limitations regarding time, budget, tools or materials.
- Timeline: simple milestones with approximate dates.
- Roles & Responsibilities: who does what and when.
- Success Metrics: how you know the project succeeded.
- Change Log: record of modifications made after initial agreement.
Using these sections ensures the brief remains short yet complete, allowing you to collaborate comfortably without losing professionalism or clarity.
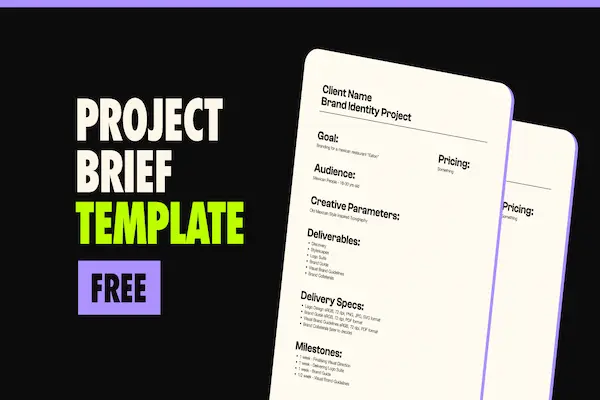
Fill-In Simple Project Brief Template
This fill-in version keeps the structure compact while guiding you through the essential fields. You can copy and reuse it for any DIY project, creative collaboration or small partnership.
One-Page Template
- Project Title: ______________________________________________
- Objective (1–2 sentences): ______________________________________________
- Background (why this project exists): ______________________________________________
- Scope – Included: ______________________________________________
- Scope – Excluded: ______________________________________________
- Deliverables:
- 1. ______________________________________________
- 2. ______________________________________________
- 3. ______________________________________________
- Constraints (time, budget, materials): ______________________________________________
- Timeline & Milestones:
- Milestone 1: ______________________________________________
- Milestone 2: ______________________________________________
- Milestone 3: ______________________________________________
- Roles & Responsibilities: ______________________________________________
- Success Metrics: ______________________________________________
- Change Log:
- Date: _______ | Change: ______________________________________________
Examples to Help You Use the Template
Seeing the simple project brief template filled out with realistic examples helps clarify what each section should contain, allowing you to write your own version smoothly without feeling stuck or uncertain about phrasing.
Example Project: Handmade Photo Board for a Friend’s Apartment
- Project Title: Wooden Photo Display Board
- Objective: Create a modern, minimalist photo display board that fits the apartment’s aesthetic and holds at least twelve photos securely.
- Background: Friend recently moved and requested a functional, minimalist piece to showcase memories.
- Scope – Included: board construction, sanding, staining, twine installation, clip attachment.
- Scope – Excluded: printing photos, wall installation.
- Deliverables:
- Fully stained wooden board.
- Installed twine and clips.
- Protective finish applied.
- Constraints: fixed $40 budget, two-day timeline, no power tools.
- Timeline:
- Buy materials – Friday evening.
- Build and sand – Saturday morning.
- Stain and dry – Saturday afternoon.
- Twine + clips – Sunday morning.
- Roles: You handle cutting and assembling; friend handles staining and finishing steps.
- Success Metrics: sturdy finish, clean look, clips aligned evenly, fits designated wall area.
- Change Log: None yet.
How to Define Clear Scope Without Overcomplicating
Scope determines what the project includes and excludes, and writing it clearly prevents one collaborator from imagining a bigger or different project than the other, which avoids misunderstandings that typically occur when assumptions go unspoken.
Because makers often think visually or spontaneously, defining scope helps translate big ideas into manageable tasks, grounding the creative enthusiasm in realistic expectations that match the available time, skill and resources.
Tips for Clean Scope Definitions
- Use “included” and “excluded” lists to avoid ambiguity.
- Keep descriptions specific rather than conceptual.
- Define the final form and purpose of the project explicitly.
- Avoid adding “maybes” or optional extras in the scope; place them in a backlog instead.
What to Include in Scope
- Physical components you’ll create or modify.
- Decorative or functional details included in the final product.
- Tasks essential to producing the final deliverable.
What to Exclude from Scope
- Additional features not originally requested.
- Tasks dependent on third parties.
- Extensions of the project unrelated to the primary goal.
Choosing Strong Deliverables
Deliverables should be concrete, measurable pieces of output that indicate progress or completion, and when defined carefully, they ensure that both collaborators understand exactly what is expected by the end of the project.
Characteristics of Good Deliverables
- Specific enough to evaluate quality.
- Observable with the senses — something you can see, touch or test.
- Independent results rather than vague intentions.
- Aligned with the objective and scope.
Examples of Deliverables for Maker Projects
- Assembled wooden frame ready for staining.
- Pattern drafted and cut for sewing project.
- Set of five handmade candles with matching labels.
- 3D-printed prototype fully cleaned and sanded.
Documenting Constraints Without Sounding Strict
Constraints help keep a project realistic by outlining the boundaries you must respect, such as limited time, fixed budgets, missing tools or restrictions on workspace, and documenting these limitations upfront prevents last-minute frustration or unrealistic expectations.
Common Types of Constraints
- Time: evenings only, weekend availability, fixed deadlines.
- Budget: cost caps or specific material price rules.
- Tools: lack of certain equipment or limited power tool access.
- Materials: using recycled or available supplies only.
How to Phrase Constraints Softly
- “To keep this manageable within our schedule…”
- “Due to available tools, we will focus on…”
- “To stay within budget, we’ll limit materials to…”
Defining Milestones and a Simple Timeline
Timelines help break the project into chunks that feel achievable, giving both collaborators a shared sense of when parts should be completed without imposing rigid deadlines that create pressure or reduce enjoyment.
Simple Milestone Structure
- Milestone 1 – setup and preparation.
- Milestone 2 – construction or creation phase.
- Milestone 3 – finishing details and quality checks.
- Milestone 4 – handoff, installation or delivery.
Tips for Setting Realistic Milestones
- Keep each milestone small enough to complete in one or two sessions.
- Add buffer time for drying, curing, resting or unexpected rework.
- Align milestones with your actual life schedule rather than ideal scenarios.
Assigning Roles and Responsibilities
Clear roles reduce confusion and friction by making it obvious who is accountable for which parts of the work, preventing duplicated efforts or forgotten tasks that would slow the project down or create tension.
Responsibility Examples
- One person handles cutting, measuring or building.
- Another person manages painting, finishing or decoration.
- Both share setup, cleanup and material shopping.
Writing roles down inside the simple project brief template removes guesswork and keeps collaboration comfortable and predictable.
Choosing Success Metrics That Actually Help
Success metrics allow you to evaluate not only whether the project finished, but whether it achieved its goals at an acceptable quality level, which makes the collaboration more satisfying and prevents “almost finished but not quite done” outcomes.
Examples of Maker-Friendly Success Metrics
- Project matches reference photos or original sketches.
- Materials hold up under use or stress testing.
- Measurements align with pre-agreed dimensions.
- Finish looks even, polished and clean.
Using measurable criteria ensures you avoid vague disagreements about what “good enough” means.
Using a Change Log to Track Adjustments
Even small DIY projects evolve as new ideas appear or unexpected constraints arise, and having a change log inside your simple project brief template ensures every adjustment is documented clearly so no one forgets what changed or when.
Change Log Structure
- Date: when the modification happened.
- Description: what changed and why.
- Impact: how the change affects scope or timeline.
Keeping this small record prevents miscommunication and makes collaboration smoother, especially when time passes between work sessions.
Final Checklist for Your Simple Project Brief Template
- Project title is concise and clear.
- Objective is written in one or two sentences.
- Scope includes both included and excluded items.
- Deliverables are specific, measurable and realistic.
- Constraints reflect actual limitations.
- Timeline includes small, achievable milestones.
- Roles and responsibilities are balanced.
- Success metrics are concrete and helpful.
- Change log is ready for future updates.