Starting to sew when you are an absolute beginner can feel intimidating, especially when you open the box and see a machine covered in knobs, dials, and unfamiliar metal parts.
Instead of trying to learn everything at once, you can focus on a few simple sewing basics for total beginners that gently guide you from confusion to confidence.
This article will walk you through a friendly path, helping you build a small sewing starter kit, understand your machine just enough, learn threading machine steps, practice a reliable straight stitch, pick beginner friendly fabrics, and finish your very first project, a simple napkin.
By the end, you will have sewn your first seam on purpose, not by accident, and you will know exactly how you got there.
Why Sewing Basics for Total Beginners Feel Scary (and Why You Are More Ready Than You Think)
Many new sewists secretly worry they will break the machine, waste fabric, or mess up every line they try to sew.
That fear often comes from trying to leap straight from “I know nothing” to “I must understand every technique,” which is a huge jump.
Learning sewing basics for total beginners works much better when you treat it as a slow, calm series of tiny skills that stack together.
At the start, you really only need to understand how to set up a basic sewing starter kit, how threading machine steps work on your model, how to sew a straight stitch, and how to choose forgiving fabrics for practice.
Everything else can wait until your hands and eyes feel more comfortable around the machine.
Instead of chasing perfection, you will focus on small wins, like threading the needle correctly, sewing one clean line on a scrap, and finishing one square napkin that actually looks like a real household item.
Building a Simple Sewing Starter Kit That Actually Helps Beginners
Trying to sew without the right tools nearby can be frustrating, even if your machine is working perfectly.
A compact sewing starter kit saves time, keeps you calm, and makes it easy to start sewing sessions without turning the house upside down.
Essential Tools for Your Sewing Starter Kit
Gather a few key items that will support almost every beginner project you tackle.
- A basic sewing machine that can sew a straight stitch and a simple zigzag.
- Universal sewing machine needles, usually size 80/12 or 90/14 for medium weight woven fabrics.
- Good quality polyester thread in neutral colors like white, cream, gray, or black.
- Sharp fabric scissors reserved only for fabric and thread, never for paper.
- Small thread snips or embroidery scissors for trimming thread ends closely.
- Straight pins or fabric clips to hold fabric layers before stitching.
- A flexible measuring tape for body measurements and project dimensions.
- A ruler or quilting ruler for straight edges and accurate cutting.
- Fabric marking tools, such as tailor’s chalk or an erasable fabric pen.
- An iron and ironing board or pressing mat, which help your projects look crisp and professional.
- A handful of fabric scraps similar in weight to your project fabric for testing tension and practicing stitches.
Smart Ways to Organize Your Kit So Sewing Feels Easy to Start
Sewing becomes less stressful when you know exactly where to find everything.
Instead of scattering tools around different rooms, keep them together in one dedicated spot.
Here is one simple way to organize your sewing starter kit.
- Choose a small box, basket, or drawer that will be your sewing home base.
- Place scissors, thread snips, and seam ripper together in one container or corner so cutting tools are always within reach.
- Store pins and hand needles in a pin cushion, magnetic dish, or small box to avoid accidental pricks.
- Line up thread spools and prewound bobbins in a section where you can see colors at a glance.
- Keep your measuring tape, rulers, and fabric markers together for quick measuring and marking.
- Fold and stack scrap fabrics separately, so you always have practice pieces that you are not afraid to ruin.
- Slip your machine manual into the same area, since you will refer to it often when threading and troubleshooting.
With this simple setup, sitting down to sew your first seam takes far less energy, because everything you need is already waiting for you.
Getting to Know Your Sewing Machine Without Feeling Overwhelmed
Modern machines can look complicated, but you do not need to understand every feature on day one.
For sewing basics for total beginners, focusing on a small set of parts is enough to get you sewing safely and successfully.
Key Parts You Will Actually Use as a Beginner
Spend a few minutes finding these parts on your own machine.
Just pointing to each part and saying its name out loud can build familiarity.
- Power switch and foot pedal, which control when the machine runs.
- Handwheel on the side, which moves the needle up and down by hand.
- Spool pin, where the thread spool sits.
- Thread guides, which lead the top thread through the machine.
- Tension dial, usually a numbered wheel that controls how tight the top thread is.
- Take up lever, a metal piece that moves up and down and helps form each stitch.
- Needle clamp and needle, which send the top thread through the fabric.
- Presser foot, the metal or plastic piece that presses down on the fabric.
- Presser foot lever, which raises and lowers the presser foot.
- Feed dogs, the small teeth under the foot that pull fabric through as you sew.
- Bobbin and bobbin area, which hold the lower thread.
- Stitch selection dial or buttons for choosing a straight stitch or other options.
- Stitch length control, which decides how long each stitch will be.
Safety Habits That Keep Your First Sewing Attempts Calm
A few simple rules greatly reduce stress and accidents.
Treat them as friendly routines, not strict rules.
- Switch the machine off whenever you are threading, changing the needle, or working near the needle area.
- Keep fingers to the side or behind the needle, never directly in front of it while sewing.
- Avoid sewing over pins to prevent broken needles and sudden noises.
- Replace bent, dull, or damaged needles promptly to protect both your machine and your fabric.
- Do not pull hard on the fabric, since the feed dogs are designed to move it for you.
Once these safety habits become automatic, you can turn your attention to threading machine steps and stitch practice with more confidence.
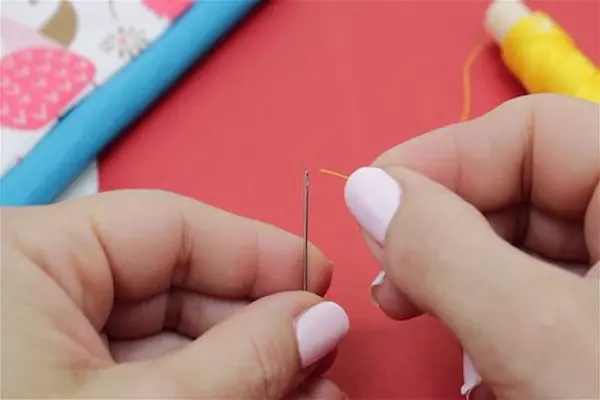
Threading Machine Steps Explained in a Beginner Friendly Way
Threading the machine is the part that makes many new sewists nervous, yet it is just a sequence of small, repeatable moves.
The exact path may vary slightly between brands, but the general journey of the thread stays similar.
Keep your manual nearby and follow along with these steps so you can adapt them to your own model.
Winding the Bobbin
Before sewing, your machine needs a bobbin filled with thread for the underside of the stitch.
This process may sound technical, but it quickly becomes routine.
- Place a spool of thread on the spool pin and secure it with the cap if your machine uses one.
- Pull the thread through the bobbin winding guide on the top of the machine, following any arrows printed there.
- Pass the thread end through a hole in the bobbin or wrap it a few times around the bobbin’s center.
- Put the bobbin onto the bobbin winder spindle and push it into the “winding” position if your machine requires that.
- Hold the thread tail gently, press the foot pedal, and let the bobbin fill, stopping when it is evenly wound and not overfilled.
- Cut the thread, slide the bobbin off, and trim any loose tail that sticks out.
Inserting the Bobbin
Machines usually have either a top loading bobbin case or a front loading one, but both serve the same purpose.
Follow your manual for details while using this general outline.
- Open the bobbin area cover carefully.
- Place the bobbin inside so the thread unwinds in the direction shown, often forming a “P” or “9” shape when you pull the tail.
- Pull the thread into the bobbin tension slot or path until it slides smoothly.
- Leave a short tail if the manual suggests it, then close the cover again.
Threading the Top Thread
Once the bobbin is in, it is time to lead the top thread through the machine and down to the needle.
Many machines print numbers directly on the body to show the path.
- Place the thread spool on the spool pin and secure it.
- Draw the thread through the first upper guide near the spool.
- Bring the thread down the right side of the front channel, following the arrow or number.
- Loop it around the bottom and bring it back up the left side toward the take up lever.
- Slide the thread through the eye of the take up lever from right to left or front to back, depending on your model.
- Bring the thread back down toward the needle, passing it through any small hooks or guides near the needle clamp.
- Thread the needle from front to back, leaving a length of thread tail so it does not slip out easily.
Bringing Up the Bobbin Thread
For many machines, you need both the top and bottom thread to sit together before you can sew.
This final step connects them.
- Hold the top thread gently with one hand.
- Turn the handwheel towards you so the needle goes down and then rises again.
- Watch for a small loop of bobbin thread to appear through the needle plate.
- Use a small object or your fingers to pull that loop out, creating a longer tail.
- Lay both thread tails together towards the back of the machine under the presser foot.
At this point, threading machine steps are complete, and you are ready for some relaxed straight stitch practice.
Practicing Your First Straight Stitch on Scrap Fabric
The straight stitch is the foundation of most beginner projects, including your first napkin.
Before sewing anything real, you will practice on scraps so mistakes feel safe and normal.
Setting Up the Machine for Straight Stitch Practice
A few simple adjustments prepare your machine for clean, even lines.
- Select the straight stitch on the stitch selector, often shown as a simple line of short dashes.
- Choose a medium stitch length, around 2.5 to 3, which works well for many woven fabrics.
- Attach or keep the all purpose presser foot on the machine.
- Lower the presser foot onto a folded scrap of fabric placed under the needle.
- Gently hold the thread tails behind the presser foot to prevent tangles when you start.
Straight Stitch Drills to Build Control and Confidence
Treat these exercises like driving practice in an empty parking lot rather than a busy highway.
You are learning coordination, not aiming for perfection.
- Sew a line straight from one edge of the scrap to the other, trying to keep the same distance from the fabric edge.
- Practice starting with very light pressure on the foot pedal so the machine moves slowly and feels manageable.
- Sew along a line that you have lightly drawn with a fabric pen, focusing on guiding the fabric rather than staring at the needle.
- Try stopping with the needle down in the fabric, lifting the presser foot, turning the fabric ninety degrees, lowering the foot, and sewing again to practice turning corners.
- Experiment with backstitching by sewing three or four stitches forward, a few stitches backward, and then forward again to lock the start and end of the seam.
- Repeat these drills several times, adjusting your hand position until the fabric feels like it glides under your fingers rather than fighting you.
These small sessions transform the straight stitch from something mysterious into a predictable tool you can trust on real projects.
Fabric Tips for Beginners Who Want Easy, Frustration Free Projects
Even with a perfectly threaded machine and good straight stitch skills, the wrong fabric can make sewing feel harder than it needs to be.
Choosing cooperative fabrics is one of the most powerful fabric tips for total beginners.
Friendly Fabric Types for Sewing Basics for Total Beginners
Stable, non stretchy woven fabrics behave kindly under the presser foot.
They do not wiggle, slide, or curl as much as slippery or stretchy materials.
- Quilting cotton, which has a smooth surface and holds its shape nicely.
- Medium weight cotton or cotton blends, similar to simple tablecloth or shirt fabrics.
- Light linen or linen blends that are not too rough or loosely woven.
Very thin, shiny, or stretchy fabrics, like satin or jersey knit, can wait until you have more practice and feel ready for a challenge.
Simple Fabric Tips That Make Cutting and Sewing Smoother
Handling fabric well is a big part of your success as a beginner.
Use these gentle guidelines whenever you prepare material for a project.
- Prewash and dry your fabric if it is likely to shrink, especially for napkins, placemats, and clothing.
- Press the fabric with an iron so it lies flat and smooth before you measure or cut.
- Place the fabric on a stable, flat surface to prevent slipping.
- Align your pattern or measuring lines with the straight grain of the fabric, which usually runs parallel to the finished selvage edge.
- Use long, steady cutting strokes with sharp fabric scissors rather than short choppy snips.
- Keep your non cutting hand away from the path of the scissors and move slowly if you feel nervous.
By combining good fabric choice with these basic handling habits, your early sewing projects will feel much more manageable.
Your First Project: A Simple Napkin Using Only a Straight Stitch
A napkin is a perfect first project because it is small, flat, and forgiving, yet it still teaches important skills like accurate cutting, pressing, and turning corners.
You will build on everything you have learned so far, from threading machine steps to straight stitch practice and beginner fabric tips.
What You Need for Your First Napkin Project
Gather these items before you start so you can enjoy the process without interruptions.
- A piece of prewashed and pressed cotton or similar woven fabric.
- Your sewing machine threaded with matching or gently contrasting polyester thread.
- Fabric scissors and small snips.
- Straight pins or fabric clips.
- Measuring tape or ruler.
- Fabric marking tool.
- Iron and ironing board or pressing mat.
Cutting Your Napkin to Size
Napkins can be made in many sizes, but a simple square keeps things straightforward.
- Spread your pressed fabric on a flat surface with no wrinkles.
- Decide on a finished napkin size, such as 35 or 40 centimeters on each side.
- Add extra around the edges for your double folded hem, usually about two centimeters on each side.
- Mark a square with your chosen measurements using a ruler and fabric marker.
- Cut along the marked lines carefully, keeping the scissors moving in smooth, confident strokes.
Once the square is cut, you have the base shape of your first handmade napkin.
Pressing a Neat Double Fold Hem
The hem finishes the raw edges and makes the napkin look tidy and intentional.
Pressing before sewing makes it much easier to sew straight lines.
- Place the fabric square wrong side up on your ironing surface.
- Starting on one edge, fold the raw edge in by about one centimeter and press the fold flat.
- Fold that edge in a second time by another one centimeter, hiding the raw edge inside the fold, and press again.
- Repeat the same double fold on the opposite edge, pressing carefully so the folds stay even.
- Fold and press the remaining two edges in the same way, adjusting corners so they lie flat and do not feel too bulky.
- Pin or clip along each folded edge to keep the hem in place until you sew.
After pressing, the napkin will already look close to finished, even before stitching.
Sewing the Hem with a Straight Stitch
Now it is time to sew the hem and turn your fabric square into a real napkin.
You will use the same straight stitch you practiced on scraps.
- Place one side of the napkin under the presser foot with the right side facing up.
- Position the fabric so the needle will sew a line a few millimeters from the inner folded edge of the hem.
- Lower the presser foot and gently hold the thread tails towards the back.
- Start sewing slowly, making a few stitches forward, then a few stitches backward, and then continue forward to lock the starting point.
- Guide the fabric so the straight stitch line stays parallel to the folded edge, letting the machine pull the fabric through.
- When you approach the corner, stop with the needle down in the fabric.
- Lift the presser foot, pivot the napkin ninety degrees, lower the presser foot, and continue along the next side.
- Repeat for all four sides, turning at each corner in the same way until you return to your starting point.
- Overlap the stitching by a few stitches, backstitch slightly to secure the end, and then sew forward again before stopping.
- Raise the needle and presser foot, gently pull the napkin away from the machine, and snip the thread tails close to the fabric.
Give the napkin one final press with the iron, and you will see a neat, finished square that you created from start to finish.
This simple project proves that with basic sewing basics for total beginners, you can already make something useful and attractive.
Troubleshooting Guide for Your First Seams
Even if you follow instructions carefully, minor issues are part of learning.
Instead of feeling discouraged, treat troubleshooting as a detective game where you match the problem to its cause.
Common Stitch Problems and Quick Fixes
When the stitches do not look right, you can often fix the issue with one or two small adjustments.
- Loops or messy thread on the underside usually mean the top thread is not threaded correctly or the presser foot was up while threading.
- Loops on the top of the fabric can suggest the bobbin is not inserted correctly or the bobbin thread is not under tension.
- Puckered seams sometimes come from tension set too high or from fabric being stretched while sewing.
- Skipped stitches may appear when the needle is dull, bent, or not suitable for the type of fabric.
A good first step for many stitch problems is to rethread both the top thread and the bobbin slowly, following your manual step by step.
Fabric Movement Issues and How to Handle Them
Sometimes the fabric does not move smoothly, or your seam allowance looks uneven.
Small changes can improve control a lot.
- If the fabric will not move forward, check that the feed dogs are raised and the presser foot is lowered.
- Jerky motion along the seam often happens when you push or pull the fabric instead of guiding it lightly.
- Wobbly seam allowances become more consistent when you watch a guide mark on the needle plate or presser foot rather than staring at the needle itself.
Over time, your hands will learn how much pressure and guidance the fabric needs, and these issues will fade.
Machine Behavior That Signals a Problem
Pay attention to sounds and unusual resistance, since your machine often tells you when something is wrong.
- Loud clunking noises may indicate tangled thread in the bobbin area or a poorly wound bobbin.
- Broken needles usually come from sewing over pins, pulling hard on the fabric, or using a damaged needle.
- The machine not sewing when you press the pedal can be as simple as the power being off or the foot pedal not plugged in fully.
When things feel off, stop, turn off the machine, and check the basics.
Look at the needle, threading, bobbin, and presser foot before you try again.
Growing Your Skills After Your First Finished Napkin
Completing a first project is a big milestone, even if you still see little imperfections.
You now have experience with a sewing starter kit, threading machine steps, straight stitch practice, fabric tips, and project construction from cutting to pressing.
Easy Next Projects That Build on Your New Skills
Rather than jumping straight into complex clothing, you can stack your skills with more simple, flat projects.
- Additional napkins in different sizes or colors to improve consistency.
- Placemats that use the same double fold hem as your napkin but in a larger rectangle.
- Simple pillowcases sewn with straight seams and basic measurements.
- Drawstring bags that introduce channels and simple openings.
- Coasters made from small fabric squares or rectangles for quick practice sessions.
Gentle Habits That Build Confidence Over Time
Confidence in sewing rarely appears all at once.
It grows every time you sit at the machine, even if you only sew for a few minutes.
- Practice new stitches or fabrics on scraps before using them on real projects.
- Change needles regularly so your machine stays smooth and stitches look neat.
- Keep your sewing starter kit organized so short sewing sessions feel convenient rather than stressful.
- Notice and celebrate small improvements, such as straighter seams, cleaner corners, or better thread tension.
- Allow mistakes to be part of the process, not proof that you are bad at sewing.
With every seam you sew, you are training your hands, eyes, and brain to work together.
Sewing basics for total beginners will gradually become familiar routines, and you will look back at your first napkin with pride, knowing it was the seam that started everything.