When digital tools start to feel noisy, cluttered and hard to trust, a simple paper system can feel like a reset button for your brain.
Instead of juggling apps, random to-do lists and scattered notes, you can build one clear home for your tasks, ideas and plans using a bullet journal.
For a busy student or an overbooked creator, that means deadlines, projects, routines and inspirations finally living together in one place that you control.
This guide will show you exactly how to start bullet journaling in a way that is simple, realistic and friendly to your real life.
Along the way, you will see a minimal bullet journal setup, understand the core spreads, learn a symbol system, walk through a full sample month and get printable-style starter pages you can copy straight into your notebook.
No drawing skills, fancy stationery or complicated rules are required, because the goal here is clarity, not perfection.
By the end, you will know how to open a blank notebook, write on the first page without fear and turn it into a calm, reliable system for everyday organization.
What Bullet Journaling Is and Why It Actually Works
Bullet journaling is a flexible analog system that uses short bullets, symbols and simple spreads to gather tasks, events, notes and plans into one notebook.
Rather than writing long paragraphs, you capture information as quick bullet points that are tagged with small icons called a key.
Those tiny symbols tell you whether each line is a task, an event, a note, a deadline, a reminder or a highlight.
The same notebook becomes a planner, a logbook, a notebook for ideas and even a reflection journal, depending on what you need at the moment.
Because the system is built on simple spreads instead of rigid templates, every page can adapt to the rhythms of your life from week to week.
Students benefit from this because class schedules change, project demands grow and energy levels rise and fall throughout the semester.
Creators gain an equally powerful advantage since ideas, content plans, client projects and personal goals can all sit together on the same pages.
Instead of bouncing between apps and formats, you always return to one physical bullet journal that shows the full picture of what matters right now.
This combination of structure and flexibility is precisely what makes bullet journaling so effective over time.
The Minimal Kit You Need to Start Bullet Journaling
One of the best parts of learning how to start bullet journaling is realizing that you can build a strong system with almost no materials.
A simple notebook and a pen are more than enough to organize your mind with a clear bullet journal setup.
The Only Essentials for Your Bullet Journal Setup
To begin, you only need two basic tools that are easy to carry and comfortable to use every day.
- A notebook with blank, lined, dotted or grid pages that you feel free to write in.
- A pen that writes smoothly and does not make your hand hurt when you take longer notes.
With these two items, you can already create spreads, track habits, plan weeks and manage projects in a highly functional way.
Everything else falls into the “nice to have” category instead of being a requirement for success.
Choosing a Notebook That Helps Instead of Annoys
While almost any notebook will work, a few details can make daily use more pleasant and practical.
- Dotted pages make it easier to draw boxes, tables and spreads without needing a ruler every time.
- A medium size such as A5 usually fits well in backpacks and bags without feeling heavy or bulky.
- Slightly thicker paper helps prevent ink from bleeding through, especially if you press harder when writing.
- A hardcover gives your bullet journal more durability and lets you write comfortably even without a desk.
- A softcover keeps the notebook lightweight and flexible if you are constantly on the move.
The most important choice is selecting a notebook that you are not afraid to “mess up” and that you actually want to open daily.
Pens and Optional Extras You May Enjoy
Once your main notebook and pen are chosen, a few optional extras can make your spreads easier to read and maintain.
- A second pen in a different color to highlight headings, categories or priorities.
- Two or three soft highlighters to emphasize key tasks, deadlines or study blocks without visual noise.
- A simple ruler or straight edge for tidier habit trackers, tables and calendar spreads.
- Sticky notes or page flags to mark important spreads such as your index or habit tracker.
Even with these extras, the power of your bullet journal will still come from clear thinking and consistent use rather than decoration.
How to Start Bullet Journaling: Building Your First Setup
With your materials ready, it is time to turn a blank notebook into a living system that supports your daily life.
The steps below will help you create a bullet journal setup that includes a key, an index, core spreads and your first working month.
Step 1: Decide What You Want Your Bullet Journal to Do
Before drawing any lines, take a brief moment to decide what problems this notebook should solve for you.
A student might want to stop forgetting deadlines, keep track of readings and build a routine of consistent study instead of last minute panic.
A creator may hope to organize content ideas, plan publishing dates, monitor client work and carve out time for personal creative projects.
- Write down three to five frustrations that you want your bullet journal to reduce.
- List three positive outcomes such as “seeing my week clearly”, “never missing a deadline again” or “finally tracking my habits consistently”.
- Use these lists as a filter to decide which spreads are essential and which ones can wait.
This quick clarity step protects you from copying layouts that look pretty but do not fit your real life.
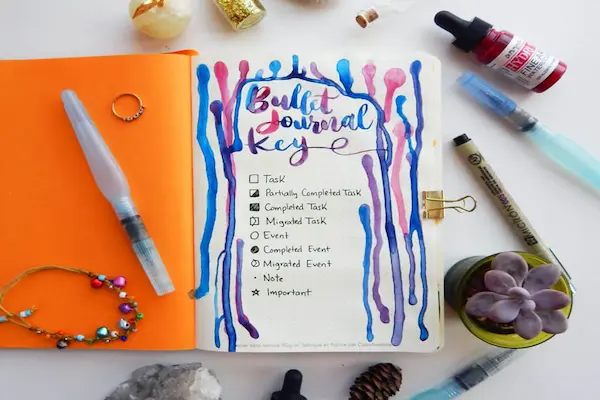
Step 2: Create a Simple Key for Your Symbols
The key is the legend that explains the meaning of each symbol or bullet type inside your journal.
Keeping this set of symbols small and clear will make every spread easier to scan at a glance.
- Dedicate one of the first pages to your bullet journal key.
- Write a heading such as “Key” or “Bullet Journal Symbols” at the top.
- Under the heading, list each symbol with a short explanation of its meaning.
An example starter key could look like this in your notebook.
- • = task to do.
- ✕ = completed task.
- → = migrated task moved to another day or month.
- ○ = event or appointment.
- – = note, idea or piece of information.
- ★ = high priority item.
- ♡ = self-care or personal wellbeing activity.
You can add new symbols later for school-specific or creative workflows once the basics feel natural.
Step 3: Set Up Your Index Spread
The index acts as a table of contents and turns your notebook into a searchable system instead of a random collection of pages.
Without an index, useful spreads tend to disappear into older sections of the notebook and become harder to reuse.
- Reserve the first two to four pages for your index.
- Write “Index” as the heading at the top of the first reserved page.
- As you create new spreads, number the pages and write their titles and page numbers in the index.
You might record entries such as “Future Log – 4–5”, “Habit Tracker – 10” or “Content Ideas – 16”.
Because the index reflects everything important in your bullet journal setup, updating it regularly saves you time every time you need to find a spread.
Step 4: Build a Clear Future Log Spread
The future log is your overview of the next few months and the place where you record anything that lives beyond the current month.
This spread gives long term tasks and events a safe home until you are ready to move them into more detailed planning.
- Open two facing pages and divide them into four, six or twelve sections depending on how many months you want visible.
- Label each section with the name of a month in chronological order.
- Whenever you hear about an exam, trip, launch, event or big deadline, write it in the relevant month section.
When a new month arrives, you will scan the future log, pull the relevant entries into your new monthly spread and keep everything flowing.
Step 5: Create Your First Monthly Log
The monthly log provides a “zoomed out” view of everything that matters during the current month.
This spread helps you avoid accidentally stacking too many commitments in the same week or forgetting important dates altogether.
- Choose between a simple calendar list or a grid of calendar boxes.
- For the list style, write the numbers of the days in a column and note events, exams and deadlines beside each date.
- For the grid style, draw a basic calendar and place key items inside the correct boxes.
On the opposite page, you can add a short overview section with small boxes for “Top Three Goals”, “Key Deadlines”, “Projects” and “Notes”.
Students might mention major assignments and exam weeks, while creators could highlight collaboration periods and content themes.
Step 6: Design Weekly or Daily Logs That Fit You
Daily and weekly logs are where you will spend most of your time working inside the bullet journal.
These spreads hold the tasks, notes and small actions that keep your life moving forward day by day.
- Weekly overviews give you a clear structure for the week and help you place tasks in realistic time slots.
- Daily logs offer more detailed space when your days are busy, creative or full of moving parts.
Many beginners like to combine a weekly overview at the start of each week with flexible daily logs that follow on the next pages.
The Core Bullet Journal Spreads You Really Need
Once your initial bullet journal setup is in place, you can focus on a small set of core spreads that cover most of your needs as a student or creator.
These spreads are simple, powerful and designed to keep your system light enough to maintain long term.
Core Spread 1: The Index
Your index is the navigation center of your notebook and deserves consistent attention.
Every time you draw a spread that you might want to revisit, you record its title and page number here.
Over time, pages like “Assignment Tracker”, “Habit Tracker”, “Content Calendar” and “Project Planner” turn your index into a map of your entire life.
Core Spread 2: The Future Log
The future log keeps long term commitments visible so that you never have to trust them to memory alone.
Instead of feeling a vague sense that “something is happening in April”, you can quickly check your spread and see exactly what you wrote there.
This simple habit reduces anxiety and supports better planning for both study seasons and creative projects.
Core Spread 3: The Monthly Overview
A monthly overview gives you context about how busy or spacious each period of the month will be.
With all the bigger events and deadlines on one page, you can decide where to place big tasks, deep work and rest.
That awareness becomes especially helpful during exam periods, launch weeks or overlapping projects.
Core Spread 4: Weekly Overviews That Guide Your Days
A weekly overview creates a bridge between your monthly log and your daily actions.
In one or two pages, you can see your classes, appointments, study blocks, work shifts and creative time slots.
- Divide the page into seven sections for each day of the week plus one for weekly priorities.
- Write key commitments into each day and assign one main focus that you want to protect.
- Keep space for new tasks that will appear as the week unfolds.
When you sit down each day, this spread helps you choose realistic tasks that fit the time and energy you actually have.
Core Spread 5: A Habit Tracker That Supports Your Goals
A habit tracker is a visual way to see whether your daily actions are aligned with what you say you want.
Students might track reading sessions, review blocks, attendance, hydration or sleep quality.
Creators may track content publishing, brainstorming, audience engagement, physical movement or focused work time.
- Select three to eight meaningful habits that clearly support your academic or creative goals.
- Draw a grid with the days of the month along one axis and the habits along the other.
- Mark each box with a dot, cross or color when you complete that habit on a given day.
At the end of each week, glance at the pattern and ask whether your habits match the results you hope to achieve.
Core Spread 6: Collections for Specific Themes
Collections are focused spreads dedicated to one topic, project or area of your life.
They let you go deeper into a subject without losing the overall sense of organization in your bullet journal.
- Students can create collections for assignment tracking, exam preparation, reading lists and group projects.
- Creators can make collections for content ideas, collaboration pipelines, launch planning and portfolio notes.
Whenever you add a new collection, remember to record it in your index so it remains easy to find and update.
Mastering Your Bullet Journal Key and Symbols
Having a bullet journal key is a strong start, yet the real magic appears when you apply those symbols consistently across your spreads.
A clear and simple symbol system makes each page readable in just a few seconds.
Using Symbols to Keep Every Spread Clear
To make your key truly work for you, treat each symbol as a status indicator that evolves as your day moves forward.
- Start each task with the base task symbol so you can instantly spot actions among other notes.
- Change the symbol into a completion mark once you finish the task to give yourself visual feedback.
- Whenever you decide to move a task to a new date, update the symbol to your migration mark.
- Keep events marked with their own symbol so you can see fixed time commitments immediately.
- Let notes and ideas keep a separate symbol so they do not compete for attention with high priority tasks.
Over time, you will find yourself skimming pages and understanding your workload in seconds just by reading the symbols.
Walking Through a Full Sample Month
To make how to start bullet journaling feel less abstract, it can be helpful to imagine how a full month would play out inside your notebook.
Picture yourself at the beginning of a new month with studies, creative work and personal life all happening at once.
The Monthly Flow from Setup to Review
- At the start of the month, open your future log and mark all events and deadlines that fall in this new period.
- Create a fresh monthly overview and copy those items into the correct dates along with any new commitments.
- Write down three key goals for the month, such as finishing specific assignments, launching a project or stabilizing a new habit.
- Design a monthly habit tracker focused only on behaviors that move those goals forward.
- Add any relevant collections for that month, like “Assignments This Month” or “Project Milestones”.
- Set up a weekly overview each Sunday or Monday so that the coming days have structure and direction.
- Keep daily logs where you list tasks, notes and events using your key and adjust the symbols as the day ends.
- Update your habit tracker every night or every couple of days, treating it as a quick check-in with yourself.
- Run a short weekly review where you list what worked, what felt heavy and what you want to change for the next week.
- Close the month with a reflection spread that captures lessons learned and decisions for future months.
Repeating this flow for two or three months will help bullet journaling become a natural part of your routine rather than another short experiment.
Bullet Journal Setup Ideas for Students and Creators
After you feel comfortable with the core spreads, you can add a few specialized layouts tailored to your role as a student or creator.
These focused spreads still follow the same simple principles while speaking directly to your daily reality.
Extra Spreads for Students Who Want Better Organization
Students often need their bullet journal to balance dates, information and motivation in the same system.
- A semester overview spread that lists each subject, the teacher, and key dates such as exams and major assignments.
- An assignment tracker with columns for subject, task description, due date, progress status and final grade.
- An exam study plan where you break the content into topics and assign them to specific days or weeks.
- A reading log for textbooks, articles and recommended books with space for quick notes or page references.
- A group project spread that tracks responsibilities, meeting notes and shared deadlines.
With these student-focused spreads, your bullet journal evolves into a central control panel for your academic life.
Extra Spreads for Creators Managing Ideas and Projects
Creators often juggle multiple ideas, platforms and collaboration opportunities, which makes a few dedicated spreads incredibly valuable.
- A content ideas spread divided by platform where you capture raw concepts, hooks and formats.
- A simple content calendar that maps posts, videos or newsletters across the month.
- A client project tracker with sections for deliverables, deadlines, checkpoints and payment status.
- A launch planning spread that organizes tasks into pre-launch, launch week and post-launch phases.
- A creative brain dump spread where you can freely park thoughts without needing to organize them immediately.
Recording these spreads in your index keeps them one page away whenever inspiration strikes or a deadline appears.
Making Your Habit Tracker Truly Work for You
A habit tracker is more than a grid of pretty boxes and colorful squares; it is a feedback tool that shows you reality.
Used wisely, this spread can gently nudge you toward actions that protect your mental health, your grades and your creative output.
Practical Tips to Turn Habit Data into Change
A few simple strategies can transform your habit tracker from a decoration into a powerful coaching tool.
- Keep the list of habits short enough that you can check them quickly without feeling overwhelmed.
- Link each habit to an existing daily routine so you know exactly when to perform it.
- Review your tracker at the end of each week and notice which habits consistently fall behind.
- Ask whether missing habits are truly important or whether they belong to a goal you no longer care about.
- Adjust habits that are too ambitious by shrinking them into smaller, more realistic actions.
By treating your habit tracker as a conversation rather than a judgment, you give yourself permission to grow at a sustainable pace.
Printable-Style Starter Pages to Copy into Your Notebook
If you love the structure of printables but prefer the freedom of a blank notebook, you can recreate simple layouts by hand.
The following starter pages are designed to look clean and structured while remaining easy to draw even if you do not see yourself as artistic.
Starter Page 1: Minimal Monthly Overview
This page gives you a calm snapshot of the month with room for priorities and notes.
- Write the month name as a centered heading at the top.
- On the left, create a vertical list of all the days and dates.
- On the right, divide the page into three boxes labeled “Top Three Goals”, “Key Deadlines” and “Notes”.
Keeping the design simple ensures that you actually use the spread instead of feeling pressured to decorate it.
Starter Page 2: Simple Weekly Planner Layout
A weekly planner page helps you turn the month’s big picture into manageable blocks of action.
- Separate the page into eight equal rectangles using a ruler.
- Label seven rectangles with the days of the week and reserve the last one for “This Week”.
- Inside each day, include a small area for must-do tasks and a space for flexible items or notes.
This structure keeps your week organized while leaving enough openness for new tasks that appear midweek.
Starter Page 3: Clean Habit Tracker Spread
A clean and minimal habit tracker can fit on a single page and still be easy to read.
- Place the title “Habit Tracker” at the top along with the month name.
- List your chosen habits in a column down the left side.
- Write the days of the month across the top and draw a grid connecting rows and columns.
Each day, fill in the squares for any completed habit and leave the others blank for a clear visual pattern.
Starter Page 4: Assignment or Project Tracker
This spread is perfect for students managing coursework or creators juggling multiple projects.
- Write a title that fits your context, such as “Assignments This Term” or “Projects This Quarter”.
- Draw a table with columns for name, due date, priority, status and notes.
- Leave extra rows at the end so you can add new items throughout the month.
By checking this spread during your weekly review, you prevent deadlines from sneaking up unexpectedly.
Starter Page 5: Brain Dump and Idea Parking Lot
A brain dump spread gives your mind permission to unload without needing immediate structure.
- Write a heading like “Brain Dump” or “Idea Parking Lot” at the top.
- Draw a light vertical line down the middle if you want two columns of space.
- Fill the page with quick bullets for thoughts, worries, ideas, to-dos and reminders.
Later, you can process this page, moving tasks into daily logs, placing ideas into collections and discarding anything that no longer matters.
Keeping Your Bullet Journal Simple and Sustainable
As you explore how to start bullet journaling, one of the biggest risks is turning the system into something too complex to maintain.
Beautiful spreads can be satisfying, yet a simple page that you use every day will always be more powerful than an elaborate one you avoid.
Principles for a Bullet Journal You Actually Use
A few guiding principles can keep your bullet journal light, flexible and sustainable over the long term.
- Prioritize function over decoration by focusing on readability and clear information first.
- Limit yourself to a core set of spreads and only add new ones when you feel a real need.
- Adopt a tiny daily routine of five minutes to update logs, migrate tasks and check your habit tracker.
- Allow messy pages and crossed-out lines because they are signs of real life, not failure.
- Review your setup at the end of each month and deliberately decide what to keep, change or remove.
Using these principles, your bullet journal becomes an honest tool instead of a performance or a source of pressure.
Common Beginner Mistakes and How to Avoid Them
Everyone makes mistakes in the early days of bullet journaling, and recognizing them can help you adjust with kindness instead of quitting.
Most of these issues come from trying to do too much, too perfectly, too quickly.
Typical Pitfalls in New Bullet Journal Setups
Several patterns appear again and again when people create their first spreads, and each one has a gentle fix.
- Copying too many complex spreads at once instead of starting with a small, focused set.
- Believing that artistic talent is required when the core method only needs clear handwriting and basic lines.
- Ignoring the index and then wondering why important pages become impossible to find later.
- Tracking an overwhelming number of habits and then feeling guilty when the grid is not full.
- Sticking rigidly to layouts that no longer match the current season of life.
- Stopping completely after a chaotic week instead of simply turning the page and starting fresh.
Whenever one of these mistakes appears, treat it as feedback about your system rather than a verdict on your abilities.
Next Steps for Confident Bullet Journaling
Now that you know how to start bullet journaling with a minimal kit, a smart bullet journal setup, essential spreads, a habit tracker and practical starter pages, you are ready to make this system your own.
Over the coming weeks, your notebook can become the place where assignments, ideas, events, habits and reflections all meet in one calm space.
As a student, you can lean heavily on spreads such as the index, future log, assignment trackers and exam planners to keep academic life under control.
As a creator, you can rely on collections for content ideas, client projects, launches and habit trackers that protect your creative energy.
Above all, remember that your bullet journal is a tool that serves you, not a test that you need to pass.
Pages can be messy, layouts can evolve and spreads can come and go as your needs shift over time, and that flexibility is part of the design.
Start simple, stay curious, review regularly and let your bullet journal grow alongside you as a steady, practical companion to your goals and everyday life.